Standalone
This guide is written for Linux systems. The process is similar on Windows, but the commands may differ. Alternatively, you can install the bot on Windows with Docker.
Before you start, you need to make sure your system meets the requirements.
If you don't have a suitable version of Node.js (you can check with node -v) and a database installed,
these community guides may help.
-
Node.js installation
How to install Node.js on various operating systems and distributions.
-
MySQL installation
How to install and securely set up MySQL on various Linux distributions.
Installation
Start by cloning the most recent release from GitHub with the following command,
where <tag> is the name of the latest release tag,
which you can find at the top right corner of this page,
or on the releases page.
By default, this will clone the repository into a folder called bot,
but you can change this by adding a folder name after the URL.
git clone --depth 1 --branch <tag>(1) https://github.com/discord-tickets/bot.git
-
Replace
<tag>with the latest release tag name, e.g.v4.0.0Example
git clone --depth 1 --branch v4.0.0 https://github.com/discord-tickets/bot.git tickets
Tip
pnpm is a faster alternative to npm.
You can install it with npm i -g pnpm, and then use pnpm instead of npm.
Next, install the dependencies with:
npm i --production
pnpm i --prod
NPM is configured to run scripts before and after installation.
- The pre-install script generates a random encryption key and then creates a
.envfile - The post-install script prepares the database, but it won't do anything the first time as you need to tell it which database to use
Environment variables
Using the .env file is the recommended way to set environment variables.
Creating the Discord application
Warning
Don't skip this section if you already know how to create a Discord application; Discord Tickets requires additional configuration. Using an existing application is not recommended.
-
Go to the Discord Developer Portal
-
Create an application
- Click the
New Applicationbutton - Give your application a name, accept the terms of service and click
Create
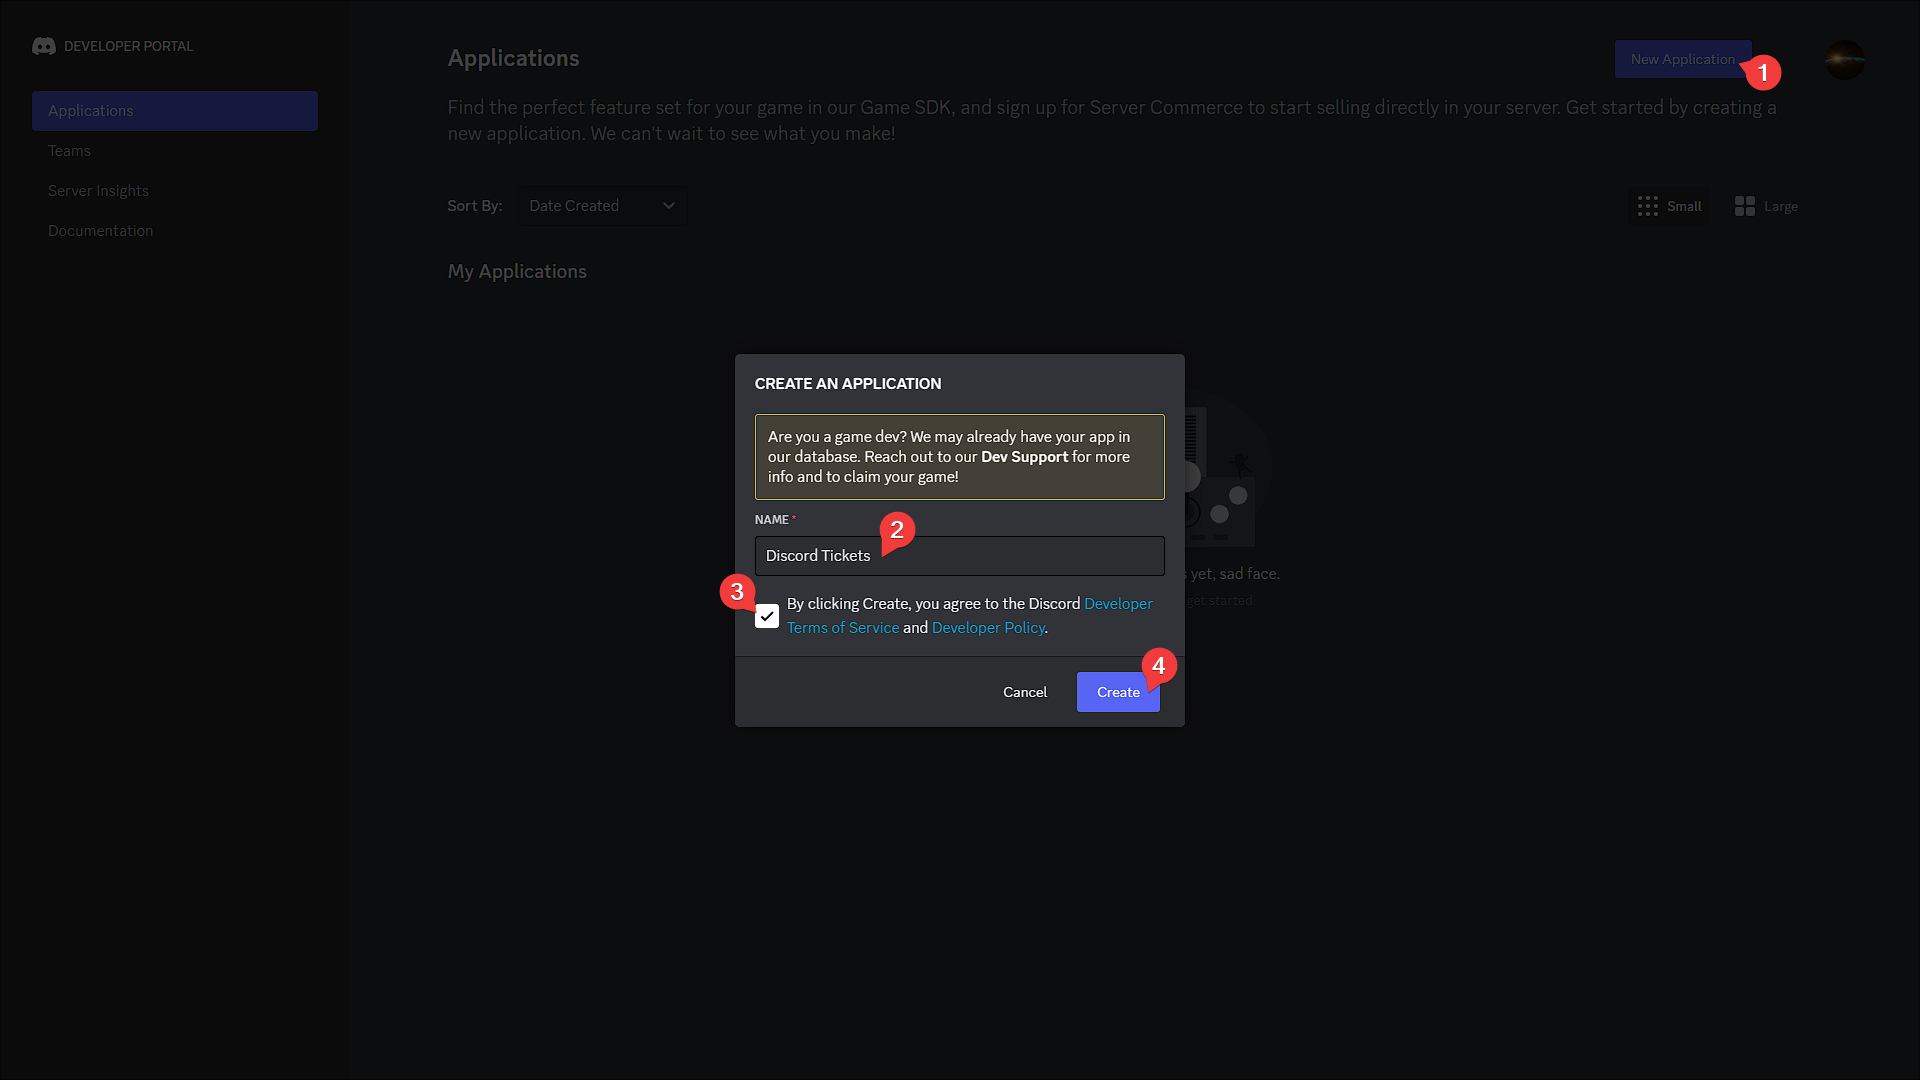 3. In the page that appears you can add a logo, description, or links to your terms of service and privacy policy if you wish to, and then click
 Save Changes.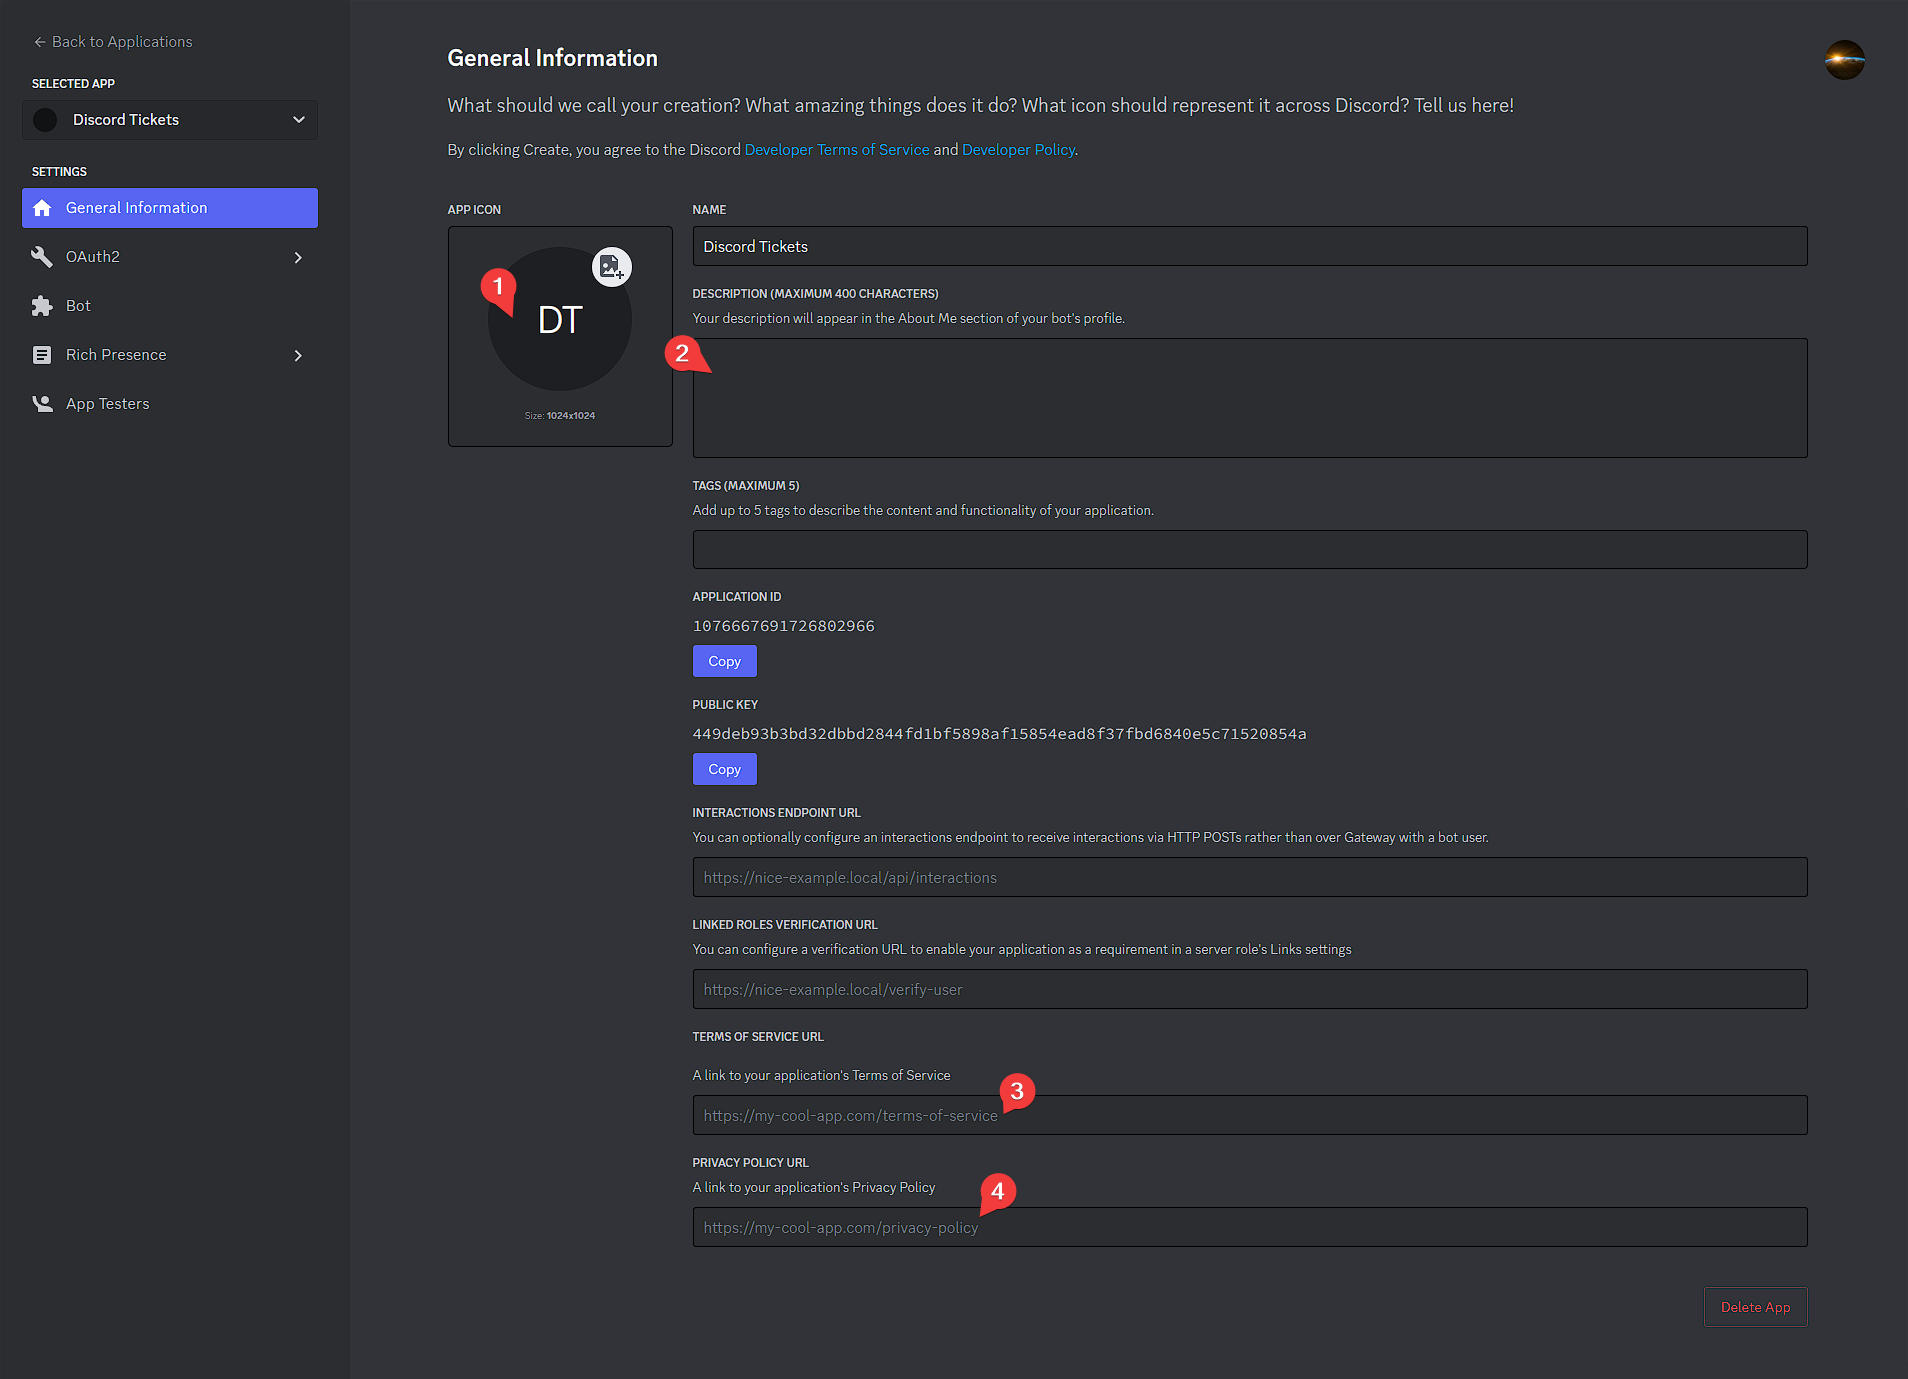
- Click the
-
Go to the
OAuth2page and clickReset Secret, thenYes, do it!. Copy the new secret and set it as yourDISCORD_SECRETenvironment variable. 5. Click
 Add Redirectand enter the value of yourHTTP_EXTERNALenvironment variable, followed by/auth/callback. Then clickSave Changes.Examples
http://12.345.67.89:8080/auth/callbackhttps://tickets.example.com/auth/callback
If you set this to
https://tickets.example.com/auth/callback, yourHTTP_EXTERNALenvironment variable must be set tohttps://tickets.example.com(without a trailing/). 6. Navigate to the
 Botpage- Click
View Token, then copy the token and set it as yourDISCORD_TOKENenvironment variable. - We highly recommend disabling the "Public Bot" option to prevent other people from adding your bot to their servers. Before you can do so, you will need to go to to the
Installationpage and setInstall LinktoNone. After saving changes, return to theBotpage and disable the "Public Bot" option.

- Enable the
presence,server membersandmessage contentintents.

Don't add the bot to your Discord server yet; you'll do that later.
Other environment variables
The only other required non-default environment variables are DB_PROVIDER,
and DB_CONNECTION_URL if you are not using SQLite as your database.
Tip
You can middle-click on links to open them in a new tab so you can easily come back to the documentation!
Refer to the configuration documentation for more information about the available environment variables, and return to this page when you have finished.
After setting the required environment variables, run the post-install script again:
npm run postinstall
pnpm run postinstall
This will connect to the database (or create it if using SQLite) and apply migrations to create the tables according to the schema. It will also generate the Prisma ORM client.
Starting the bot
You can now start the bot with:
node .(1)
- You might have noticed that there isn't an
index.jsfile at the root of the repository. This command works because themainfield in thepackage.jsonfile is set tosrc/, sonode .can be used to start Node.js withsrc/index.jsas the entrypoint.
The first time you start the bot, it will copy the default configuration into user/config.yml.
If you want to customise your bot's status/activities, refer to the configuration guide. You will need to restart the bot for the changes to take effect. (1)
- Type
exitor press Ctrl+C to stop the process.
Daemonising
Currently, the process will end when you close the terminal (or disconnect your SSH session).
To run the bot in the background, you can turn it into a service with systemd, screen, pm2 etc.
PM2
PM2 is a process manager made for Node.js applications and is the easiest option.
Install PM2 and then start the bot with:
npm i -g pm2
pnpm add -g pm2
pm2 start .(1)
-
You can give the process a custom name with the
--nameflag.Example
pm2 start . --name tickets
Refer to the PM2 documentation for more information.
Publishing the commands
Type commands publish into the bot's console to publish the commands to Discord.
Reverse proxy
If you have a domain name, you should set up a reverse proxy with SSL/TLS
and set the HTTP_TRUST_PROXY environment variable to true.
Next steps
If your bot is running, congratulations, you have successfully installed Discord Tickets, and now it's time to set it up in your Discord server.
Join the community on Discord and get notified when updates (with new features and fixes) are released.
Refer to the configuration guide for a step-by-step guide on how to add and configure the bot in your server.
Having trouble?
If you haven't got the bot running yet and need help, you can ask for help on Discord or on GitHub.