Railway
Warning
Due to sharing an IP address with other Railway users (who may also be hosting a Discord bot), you are more likely to encounter rate limits. It should be fine, but you should consider other hosting options if you have a large guild and tickets are critical.
Pricing
Railway no longer offers a free tier after the $5 trial. New users will have to pay $5/month.
Deploying
Click the button below to deploy the bot on Railway. Come back to this page before continuing.

Environment variables
There are three environment variables that you need to set before deploying the bot.
Screenshot

Creating the Discord application
Info
This content is shared between all of the installation guides. Skip step 5 and come back to it later; Railway will give you a URL after you deploy the bot.
Warning
Don't skip this section if you already know how to create a Discord application; Discord Tickets requires additional configuration. Using an existing application is not recommended.
-
Go to the Discord Developer Portal
-
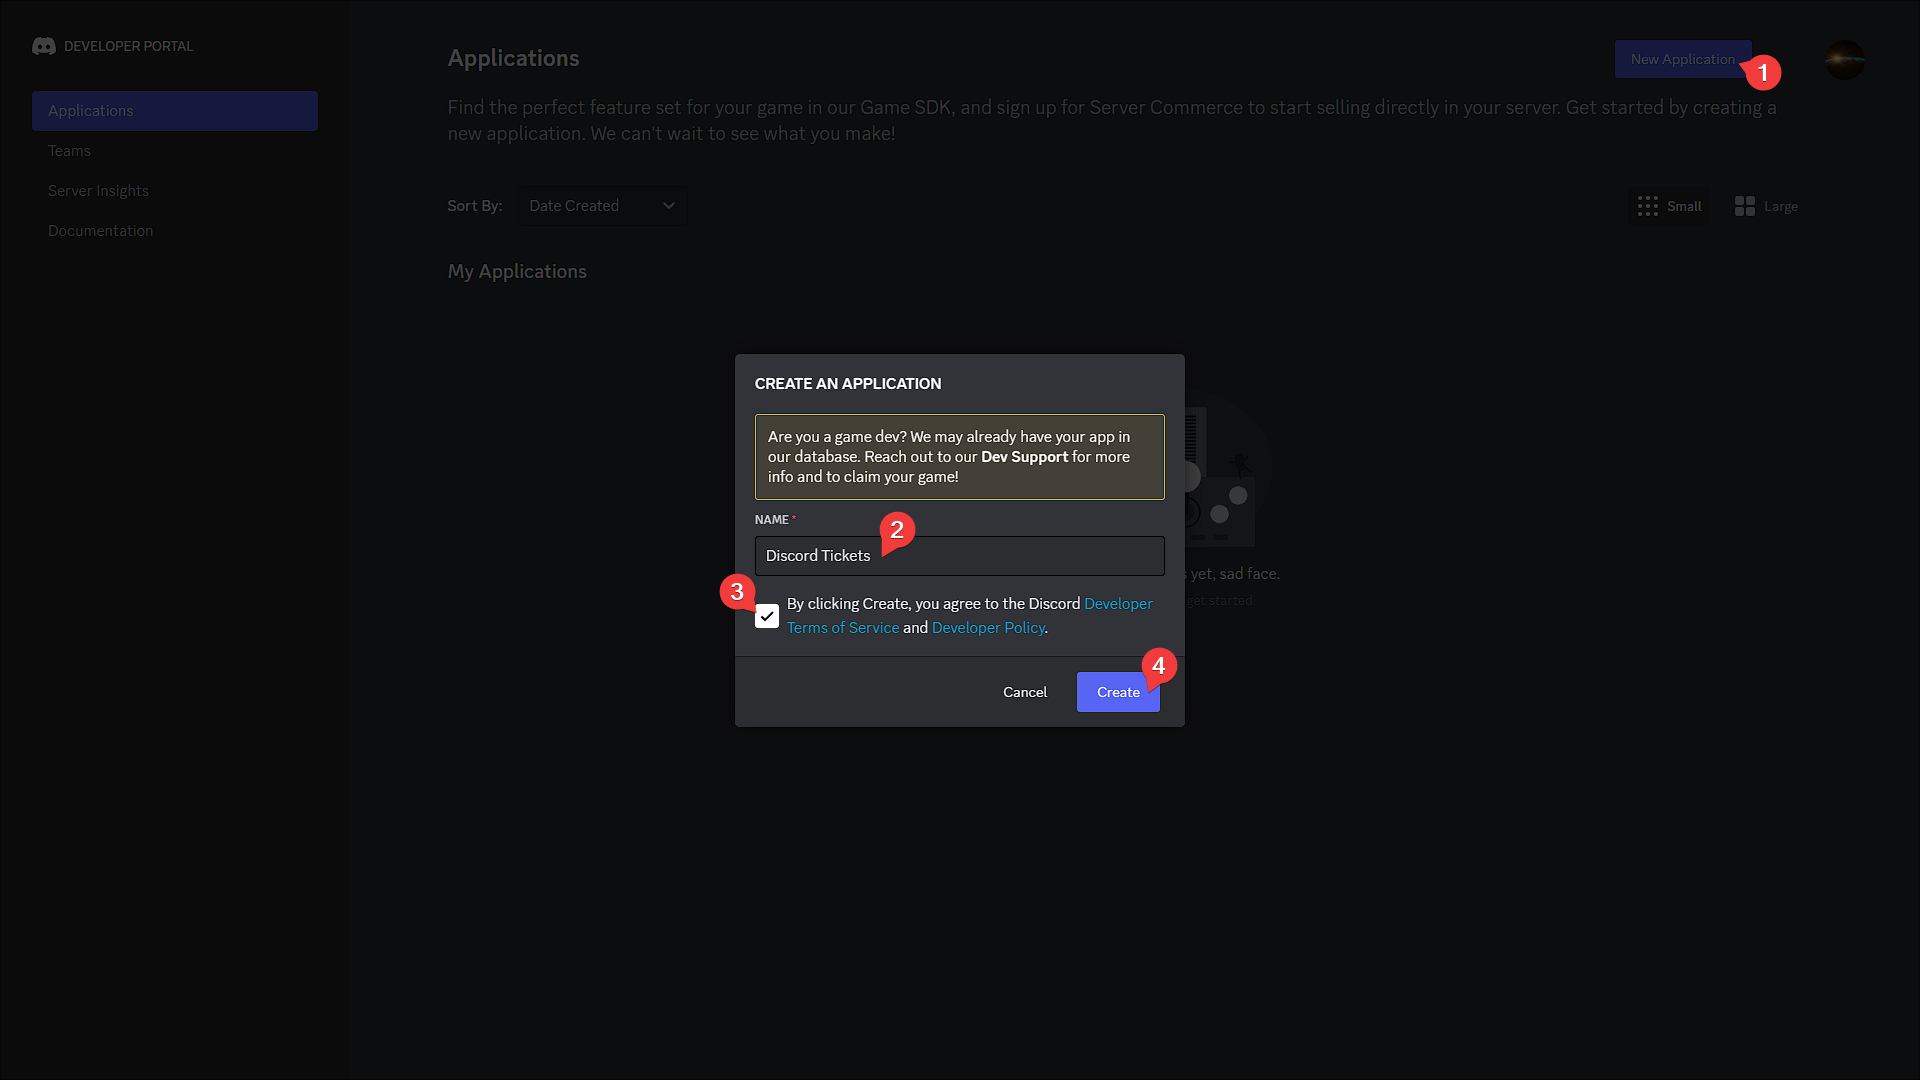
Create an application
- Click the
New Applicationbutton - Give your application a name, accept the terms of service and click
Create
 3. In the page that appears you can add a logo, description, or links to your terms of service and privacy policy if you wish to, and then click
 Save Changes.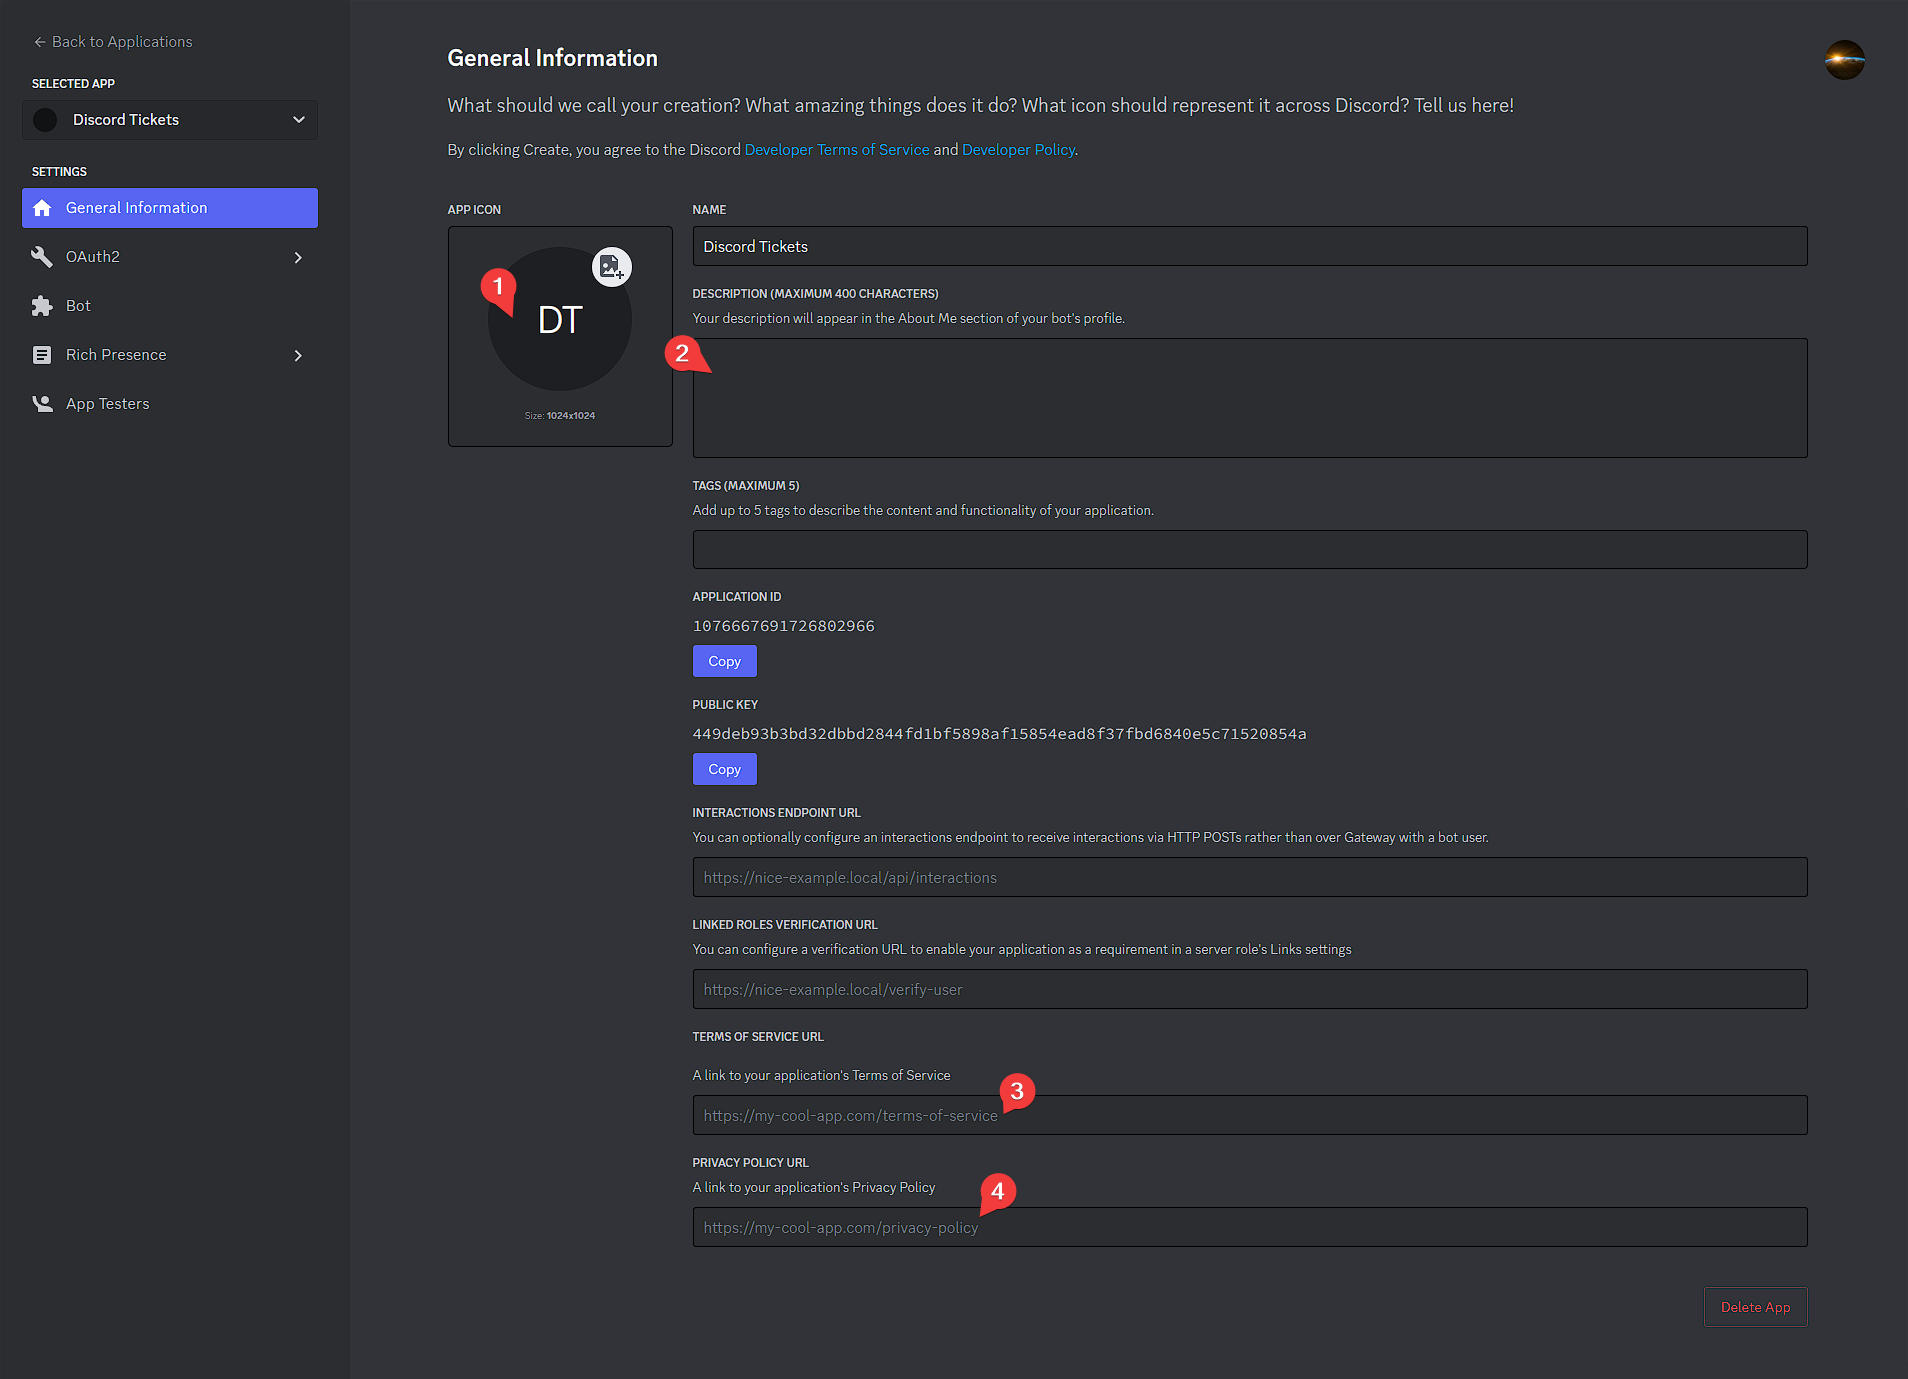
- Click the
-
Go to the
OAuth2page and clickReset Secret, thenYes, do it!. Copy the new secret and set it as yourDISCORD_SECRETenvironment variable. 5. Click
 Add Redirectand enter the value of yourHTTP_EXTERNALenvironment variable, followed by/auth/callback. Then clickSave Changes.Examples
http://12.345.67.89:8080/auth/callbackhttps://tickets.example.com/auth/callback
If you set this to
https://tickets.example.com/auth/callback, yourHTTP_EXTERNALenvironment variable must be set tohttps://tickets.example.com(without a trailing/). 6. Navigate to the
 Botpage- Click
View Token, then copy the token and set it as yourDISCORD_TOKENenvironment variable. - We highly recommend disabling the "Public Bot" option to prevent other people from adding your bot to their servers. Before you can do so, you will need to go to to the
Installationpage and setInstall LinktoNone. After saving changes, return to theBotpage and disable the "Public Bot" option.

- Enable the
presence,server membersandmessage contentintents.

Don't add the bot to your Discord server yet; you'll do that later.
Other environment variables
The only other required environment variable that isn't set for you is ENCRYPTION_KEY.
Copy the value below and paste it into the ENCRYPTION_KEY field on Railway.
Click to regenerate
|
|
Tip
You can middle-click on links to open them in a new tab so you can easily come back to the documentation!
Refer to the configuration documentation for more information about the available environment variables, and return to this page when you have finished.
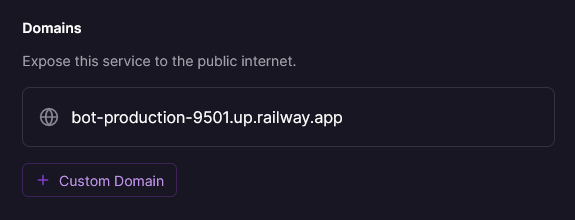
Finding and changing the URL
Click on the bot(1) service, then Settings.
- It may have a different name if you changed the name of your cloned repository.
Here you can copy the default URL or change the subdomain to something less generic. If you have one, you can also add a custom domain, which will look much better.
Go back to the Discord Developer Portal and add the URL as an allowed OAuth2 redirect URL.
Screenshot
Publishing the commands
You can't interact with the bot's console on Railway, so commands are published automatically at startup.
Next steps
If your bot is running, congratulations, you have successfully installed Discord Tickets, and now it's time to set it up in your Discord server.
Join the community on Discord and get notified when updates (with new features and fixes) are released.
Refer to the configuration guide for a step-by-step guide on how to add and configure the bot in your server.
Having trouble?
If you haven't got the bot running yet and need help, you can ask for help on Discord or on GitHub.